I fell in love with the Serafina fabric at Pottery Barn and created a cornice using their table runner. My inspiration:
Here are instructions and materials needed to create a window cornice in less than an hour:
-Drywall screws / sinkers
-Wood board 1”x6”xlength of window + overhang
*Tip: You can get your board cut for FREE at Home Depot
-Fabric
-Decorative cording with a lip for easier stapling (Jo-Ann’s)
-Wood board 1”x6”xlength of window + overhang
*Tip: You can get your board cut for FREE at Home Depot
-Fabric
-Decorative cording with a lip for easier stapling (Jo-Ann’s)
-Staple gun
-Drill
*Helper
Directions:
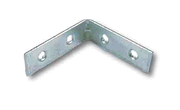
We started by installing the L-brackets into the board about 6” from the edges of the board (Your board will appear like a shelf when installed against the wall.).
-Drill
*Helper
Directions:
We started by installing the L-brackets into the board about 6” from the edges of the board (Your board will appear like a shelf when installed against the wall.).

Next, mark the center of the board and the center of the window. Make sure to center the board on the window and trace the drill holes onto the wall (Your helper will come in handy when attempting to trace the holes while keeping the board balanced and centered.) We wanted to give the illusion of a larger window so we set the board about 10” about the actual frame.
Now, find the center of your material, start stapling from the center and work around the edges of the board.
Now, find the center of your material, start stapling from the center and work around the edges of the board.
Next, using the same stapling method, take your decorative trim, and staple it along the top of the board to conceal the staple marks on the front. Trim with a lip is great for stapling, but you could also use a glue gun to adhere regular cording or fringe.

Finally, drill holes in the wall where you made your marks earlier. Use drywall screws and sinkers to ensure your cornice will stay installed! We found this out the hard way when it crashed to the ground in the middle of the night a few days later...
ACTUAL PHOTOS COMING SOON!!


0 Comments:
Post a Comment